Monday, March 25, 2013

How to Make an Isolation Mask

As an oncology nurse, I often have patients in protective isolation because they are neutropenic.  Their immune system is depressed, so they have to be extra careful to avoid germs.  Part of this protection includes every visitor to their room wearing a mask.  The masks where I work have started to give me a rash on my face, so I set out to make a homemade and reusable version!  This could also be useful for surgical nurses or techs, any nurse working in a hospital setting, or for anyone with a family member or friend with a depressed immune system!


Here are the pieces of the mask!
It's important to iron all the wrinkles out of the fabric to start!


These are all the measurements for you to cut out your fabric.


1. Iron a 1/2 inch fold on the wrong side, on the bottom of your main mask piece.

2. Flip the fabric over and fold the same 1/2 fold up on itself.  Iron in the crease.


3. Flip the fabric again and now fold a 1 inch crease.  Iron in place.


4. Flip the fabric and tuck down a 1/2 inch fold.
Now you're just going to repeat!  Fold up 1 inch on the wrong side, the tuck and fold a 1/2 inch on the right side!  It's easier to do than it is to put into words.  Follow the pictures.  You're making an accordion fold.


5. Make and iron another 1 inch fold on the wrong side.


 6. Tuck and iron another 1/2 inch fold on the right side.

 Keep going until you get to the top of the fabric.  You will end up with half the original length: about 4 inches.

7. Now grab one of the 7.5 x 2 inch pieces.  Fold in the short sides 1/2 inch, and iron in the crease.


8. Now fold it the long way, and iron a crease.  This crease will be a landmark.

9. Now fold each long side toward the center.  It should end up looking like the picture below.


10. Finally, fold this in half again, and iron.

11. Repeat steps 7-10 with the other 7.5 x 2 inch fabric.

12. Repeat steps 8-10 with the two 4 x 2 inch pieces of fabric.

Now you should have all the pieces you need!  They should look like the picture below. 


13. Now, pin one of the 4 x 2 pieces to the right side of the mask with the open side facing out.

14. Slip the elastic into the fold near the top and bottom.

15. Pin into place and sew.


16. Repeat on the left side.


17.  Now take the 7.5 x 2 inch piece with the open side facing inward.

18.  Pin and sew into place.

19.  Stand back and admire your isolation mask!


Tuesday, March 19, 2013

DIY Driftwood Dresser Makeover


This is a dresser that my parents-in-law gave to us when we first got married.  THEY had had it since they had first gotten married.  It's a good quality dresser, but it was in need of some updating.  I wanted something that would fit into my room's yellow and grey color scheme, but not so matchy as to paint it solid grey.  No wood stains seemed right to me.  Then I thought of a beachy driftwood finish.  Perfect!  So, I got to work.


Of course I had to start at my favorite website, Pinterest, for some ideas of how to go about this and found this website.  So my technique is based on that.

Supplies:

  • sand paper or power sander (recommended*)
  • quart of flat grey-brown paint
  • quart of flat white paint
  • paint brush
  • 2 plastic disposable cups
  • clear polurethane spray

I chose Granite for my grey-brown base
1. Remove drawers, and sand entire dresser down to bare wood.  Set drawers aside.
Side note: I didn't sand the drawers, and I wish I would have.  The grain of the wood makes this much more realistic.

2. Mix 1 part water to 2 parts grey-brown paint.  Quickly paint over entire dresser, letting the wood grain show through a little.  Allow to dry thoroughly.


3. Mix 1 part water to 2 part grey brown and half fill one of your plastic cups with the mixture.  Add the white paint to your other plastic cup.

4. Dip your brush into the white paint, then the grey mixture.  Wipe the brush off on the inside rim of the grey mixture's cup until it is just damp.


5. Tilt your brush to a 15 degree angle and very softly paint lines from one side to the other.  It's ok if they're not perfectly straight.  Allow to dry.


6. Remove all of the hardware from the drawers.

7.  Use the same two cups from above and repeat step 5 one or two times until the wood looks the way you like.  Remember, every time you dip the paint brush with white paint on it into the grey mixture, the grey mixture gets a little lighter.


8. Repeat steps 2-6 on each of the dresser drawers.  Allow to dry thoroughly.

9. If there is any detail on the drawer, paint it white.  Like I said I didn't sand the drawers, so it took three coats to cover the dark brown wood.

10.  Spray the dresser and the drawers with polyurethane.

11. Put the drawer pulls back onto the dresser.


Spring Activities

The first day of Spring will be here in 2 days, and at least where I live, it doesn't feel like spring outside!  Here are some spring activities to get you inspired when spring has finally sprung where you live!

Grow Live Butterflies


I found this kit at Target, and it was well worth the $20.  My kids had SO much fun watching and waiting for the butterflies to hatch out of the cocoons.  After you buy this kit, you send away for the caterpillars.  The kit includes food, a petri dish, and everything that you need.  I think it took about a week and a half for the caterpillars to arrive.  Then we put them in this pop up netted cage.  That's it!  They do everything they would do in nature, your kids just get to watch it happen.  Over the course of a couple weeks, the caterpillars crawl up to the ceiling of the cage, make their cocoons, and eventually are "born" out of the cocoons.  It is a great way to teach your kids about the life cycle of butterflies as well!  

Butterfly Kit!


It was a super exciting day when we came down and saw our first butterfly had popped out of its cocoon.  One thing I didn't expect: the cocoons dripped two or three drops of what looked like maroon food coloring when they came out of the cocoons.  I'm not sure what that was all about (fill me in if you know!), but the butterflies seemed totally healthy!

After the first butterfly came out, the kids watched the cage like little hawks and got to see all the other ones emerge from start to finish!  It was so funny to watch them go crazy while all these "baby butterflies" were "born"!

So excited their butterflies were born!! :-)


Play in the Mud

 I always resist it, but then I'm always glad I let them.  These are the memories they remember forever!


 Children's Museums


When you've got a tiny baby, sometimes they have to come along on big kid adventures.  Fresh air and lots interaction makes for a sleepy baby at the end of the day.  The trick is to plan for what they are going to need.  These outings will most likely be shorter than big kids would like.  Children's Museums are great because there is usually a quiet room or area for baby to decompress or for mom to breastfeed.  The car ride home is also great because big kids are tired out and quiet, and I haven't met a baby that doesn't love the gentle vibration of a car ride!


2011

2012


Go to the Park


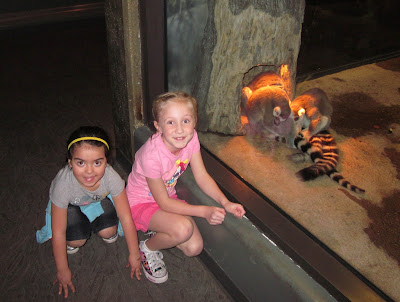
Playdate at the Zoo