Friday, April 26, 2013

Getting a New Puppy!

In the Humane Society with my mom and sister.
We got a puppy!!  It's always such excited news when someone tells you that, isn't it?  We really did get a little puppy this week.  He is a beagle mix (with what we don't know) from the Humane Society.  He was transferred from St. Joseph, MO where they don't have a Humane Society.  Rather than face the unhappy alternative, they try to place dogs with other shelters in the region.  We found him in a kennel with his sister where they were named Roderick and Lilly.  Ava decided when she saw Mr. Roderick online that he should be named Bones.  It's definitely a name from the mind of a 6 year old, but I love the names Ava comes up with so it stuck from the beginning!  Ava came up with "Arfy" and "Simponella" for two favorite stuffed dogs when she was 3, and I got a big kick out of that too!  Anyway, "Roderick", now Bones, and Lilly were adorable all cozied together sleeping!

Bones weighs about 6 pounds now, and will hopefully get up to about 25 (and not more!).  His coloring is pretty distinctly rottweiler, which was a big concern for us, but when we visited the vet she thought if he were half rottweiler he'd certainly be bigger than 6 lbs. at 11 weeks old!  Her guess was that Mr. Bones was half beagle, half mutt so probably had multiple other breeds in his family.  She was careful to say though, that there's no way to tell until the dog is an adult and even then it would be an educated guess.  She also said his coloring might change as he gets older.

Anyway, I had a dog growing up, but Alex, my hubby, did not.  He has not been really enthusiastic about this dog idea, and I can't blame him.  They're money, and work, and responsibility, and slow you down when you're planning outings and vacations.  I knew all this, and still I wanted the experience of having a dog for my kids.  My parents got our dog when I was 14 years old, and I really didn't get the experience of growing up along side a dog.  I want that for my kids.  So after much discussion, hemming and hawing (on both sides), and debate, Alex tentatively agreed to get a dog.  I watched the Humane Society's website, and the perfect little dog seemed to fall in our lap.  At least I thought he would be perfect.  


The day Bones decided to show up was not exactly ideal.  Both Nolan and Luke were feeling sick.  I kept Nolan home from pre-school.  All they wanted to do was sleep, and they had fevers the night before.  Bones came home and immediately melted my heart cozying up to Nolan while he rested on the couch, and played games on the Wii.  Nolan was so sick, in fact, that he really wanted nothing to do with Bones, but Bones gently laid next to him and snoozed.  It was too cute!


As expected, Bones has lots of energy and is very playful.  He likes this giant raccoon looking toy that's bigger than he is.  I took him out every 2 hours to go to the bathroom, and he had NO accidents.  Then at bedtime I let him fall asleep wrapped up in his blanket and he slept all the way through the night!  I wasn't sure how I got so lucky! ...until the next night.


The next night he was owly.  He cried ALL. NIGHT.  Everyone warned me.  Alex didn't even want this dog, so I went downstairs and tried holding him to calm him.  Of course every time I left him he cried more.  He never gave up or took a break.  Then I moved his crate to the farthest corner of the main floor.  Still it was just as loud in our bedroom. Then I moved the crate to the basement.  STILL you could hear his crying through the vents.  Then stressed out Bones pooped in his crate.  ARGH!!  I ended up sleeping on the couch with Bones, so that Alex could get some rest.


I am exhausted and a bad morning followed a bad night.  Bones didn't want to pee outside because it was freezing cold.  He did fine with this on the day before.  I waited and waited, only to come inside and have him try to pee on the carpet.  Back outside we went.  I told the kids they had to WATCH him if he was out of the crate, or else back he went.  I had to get kids ready for school and couldn't do both.  So, of course Bones ate Ava's scrambled eggs that slopped onto the floor.  Are eggs bad for dogs???  They're ok right?  
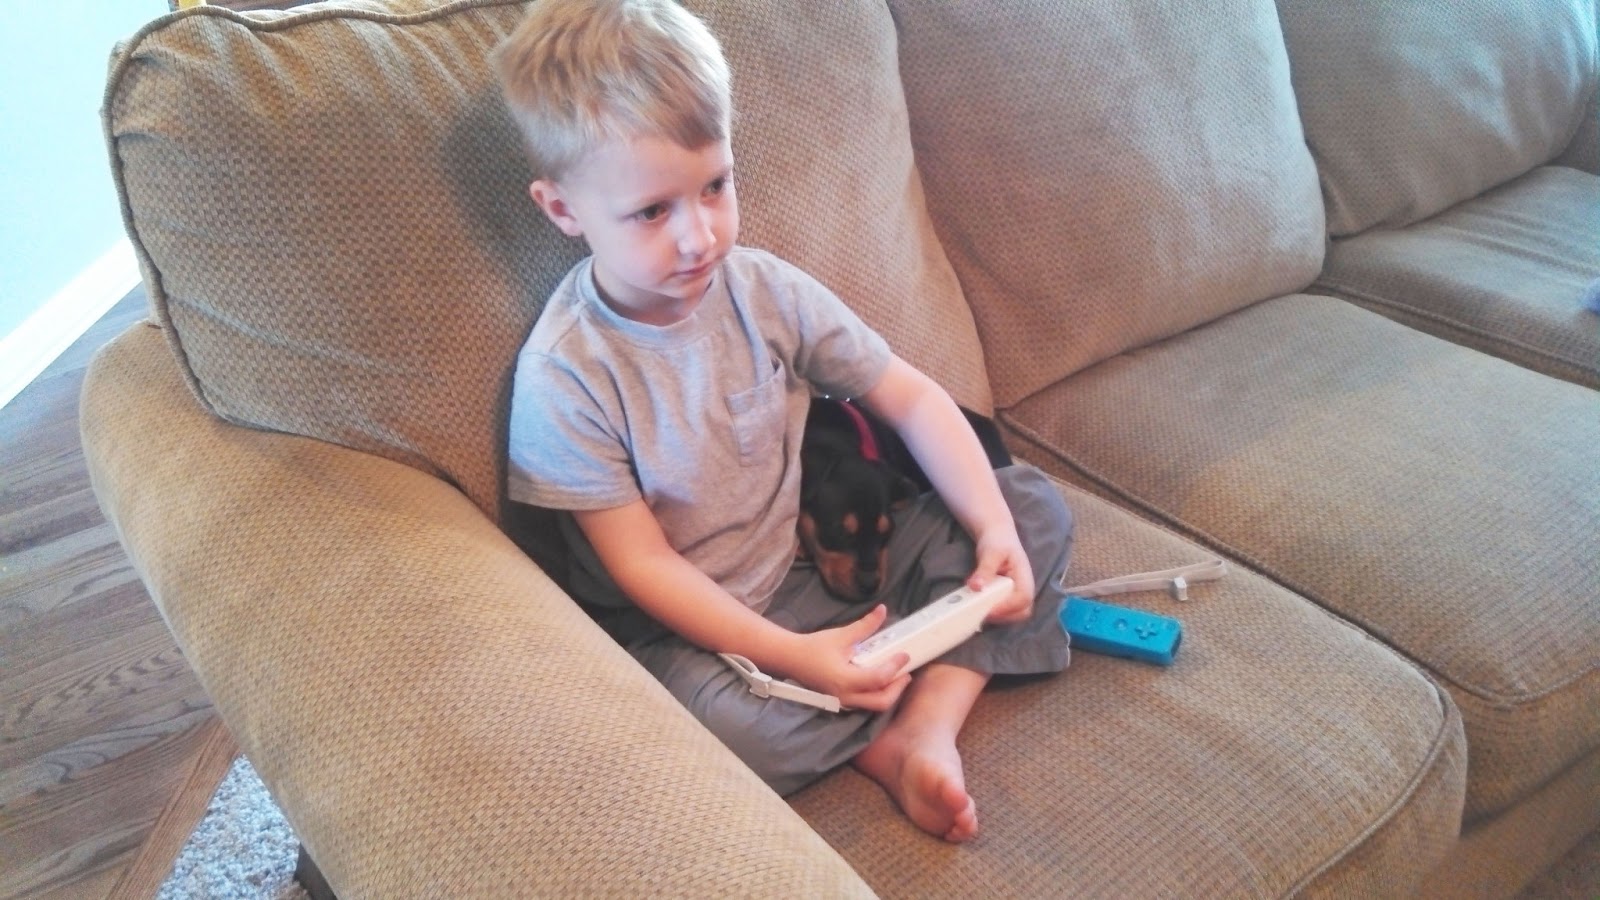


Needless to say, I started having second thoughts about this decision that I was so sure about.  I wanted a dog for Ava to bond with, and for Luke to socialize and interact.  This is a 12-15 YEAR commitment.  What was I thinking??  I have something else to keep me from going out and freedom.


Ava and Bones
Then there was Day 3.  It was more like I expected Day 1 to be.  Bones was sweet, and fun, and playful, but he did have an accident once, which I promptly disciplined him for and took him out.  At night he cried, and I was prepared for this, but Ava was NOT.  She cried hysterically listening to Bones wail in his crate.  Finally, we made the decision to put the crate in the girls' room.  A book I read about training beagles said putting the crate in your bedroom was an alternative, and I told them this would be temporary.  Well, every one slept soundly all last night.


I'm thinking I might give this Bones character a little more time.  He is pretty cute. :-)


Wednesday, April 17, 2013

Tattered Book to Mod Wall Art

Pinterest time!!  I have found a new project, and so am taking another slice out of the bare walls of the kids' rooms!  This one is from the blog Fabulously Flawed.  You can find it here.


As you can see, she took whole pages and mod podged them at different angles onto a canvas.  Don't you love it?  I know I do!

As usual, I did my own different take on this.  When I saw the above, I immediately thought of Cooking with the Cat.


When Reese was in 1st grade Cooking with the Cat was the first book that she could read really quickly and well.  I remember her looking about ready to burst with pride.  Well, Reese is #1, and Luke, #4, decided that he also liked the book when he was 9 months.  Sad to say, the binding broke and the front ripped.  It fell apart and has been sitting on the shelf in pieces for a long while.

So, I got to work!

First I got out this old framed poster.  It hung in my bedroom during my childhood, and has been in storage for my whole marriage.I decided to use this for the base for my project.  It's printed on glossy poster paper.

I cut out the different images and words that I wanted to use, and then used the border of the original picture as a guide for where to paste my new ones!  I used mod podge for it all.


I arranged the pictures before I did any gluing.


Easy Chicken Bake in the Crockpot


I happened on this recipe when I was low on groceries.  I took a chance and tossed a bunch of ingredients in the crock pot and hoped for the best!  If the stuffing (aka dressing) at Thanksgiving dinner is your favorite, you are going to love this!  Today where I live, there is a cold soaking rain pouring outside.  It's dark and gray, and the perfect weather for warm cozy clothes and comfort food!  Necessity is the mother of invention, and I wanted to share my little experiment in the kitchen with you!  Maybe the best part of this, is that it fills your house with a very Thanksgiving-ish, yummy smell.

Easy Chicken Bake in the Crockpot

Serves 6

Ingredients:

  • 1 can chicken broth
  • 1 box Chicken Ricearoni
  • 1 to 1.5 lbs. boneless, skinless chicken breast
  • 10 oz. package frozen corn
  • 2 cups shredded mozzarella cheese
  • 1 cup shredded sharp cheddar cheese

Layer ingredients in the crockpot in the above order.


First add the chicken broth, then the package of rice-a-roni.

Then layer the chicken breast. Just lay it frozen on top of the rice.


 Then layer the corn, followed by the mozzarella and sharp cheddar cheese.


Cover and cook on low for 6-8 hours, stirring occasionally.
About an hour or two before it's done, use forks to shred the chicken.  It should be pretty tender and easy to shred at that point!

Hope you enjoy it like I did!


I also calculated the nutrition facts using this recipe calorie calculator.  This is definitely a once in a while dinner, but worth it!

Friday, April 12, 2013

Pennant Garland


My daughter has her First Communion coming up next weekend, so I wanted a little extra decoration for the occasion.  I made this from material I had lying around from previous projects so the price was right!  

Materials
  • Jute cord - 2(the length the garland will cover + 10 inches)
  • 2 colors of cotton fabric- ~ half yard
  • burlap fabric ~ half yard
  • fabric scissors

1. In Microsoft Word, click on the Insert tab.  Then click the word Shapes, and click on the image of the triangle.

2.  Double click on your blank page and a generic triangle will pop up.  

3. Now, click the format tab.  On the far right side of the top of your screen you'll see a box for length and width.  Enter 9 for length and 7 for width.

4.  Print this and cut it out.  This is the template for your pennant!

I have a smaller triangle drawn in the middle.  This triangle is 8x6 inches.  It will be the actually size of your pennant, after the seam allowance. 


5. Measure the doorway for your pennant.  Then, add 10 to this number.  That will be the length of your banner.  Now double it.

You will be folding the jute in half, so you need double the length.

6. Divide the length of your doorway by 8 (not including the extra 10).  Round down to the nearest whole number.  This is the number of pennants you'll need to make.

7.  Pin the triangle you cut out to a piece of fabric, and cut around the triangle tracing it with your scissors.  Repeat.

8.  Now sew those to pieces together with right sides facing eachother.

9.  Turn inside out and iron.

10.  Repeat for all the pennants you need.

11. For the burlap, use the 8x6 inch triangle.  Sew together, but don't turn inside out.
It would be too bulky and lumpy since burlap is thick and rigid.

11. Fold down the top edge of your pennant 1/2 inch and cut a small slit at each top corner.  This is where the jute cord will slide through.


12. Fold your jute cord and slide the pennant onto the looped side.

13.  Once all the pennants are on, tie the open end.


You should have two looped ends now.  You can hang your garland on nails or just tape like I did.
Enjoy your event or just enjoy a new decoration for your space!


Monday, April 8, 2013

Going Gluten Free

I have been struggling with autoimmune hypothyroidism (Hoshimoto's disease) for over a year now, and can't seem to get a hold on it.  I have seen an endocrinologist and taken medication for all that time, but still can't seem to lose weight, I have low energy, depressed mood, feel cold all the time, and generally just don't feel healthy.  It doesn't seem to matter if I eat 500 calories or 2,500 calories in a day, the scale does not budge.

Then I heard from a few different people that a gluten free diet can help ease thyroid symptoms.  Thinking I had nothing to lose, I started to be gluten free about a week ago, and wow what a difference!  I almost immediately had more energy and have been losing fractions of a pound every day!  Here are two recipes that I've tried and liked that are gluten free.

Gluten Free Banana Bread

This is a family recipe for banana bread that I have modified to be gluten free.  It turned out pretty tasty- just slightly spongier and stickier than the bread with regular flour.  Also try almond flour for a drier more crumbly bread.  Yum!


Ingredients:
  • 3 ripe bananas
  • 1 cup sugar
  • 1 egg (room temperature?) the family recipe says room temperature- not sure why or whether that makes a difference!
  • 1/4 cup butter (softened)
  • 1 1/2 tsp. baking soda
  • 1 tsp. salt
  • 1 1/2 cups sweet white rice flour


Mash the bananas in a medium bowl.  Add the rest of the ingredients, and mix well.  Bake uncovered at 350°  for 50 minutes.


Then remove from oven, cover, and bake for another 30 minutes at 350°.


There you have it!


Gluten Free Snickerdoodles


I found this recipe from Betty Crocker, and it is my favorite of these two recipes!  The cookies are light and crumbly, and delicious!  Once they're totally cool they have a little crispiness to them that I loved too.  I highly recommend trying this recipe if you are a snickerdoodle, or just plain cinnamon fan!

I have heard from a fellow gluten free fan that Betty Crocker makes a whole slew of good gluten free products as well from cake mix to muffins.  It may be worth checking out!


Wednesday, April 3, 2013

Laundry, Laundry Everywhere


Interesting.  I noticed yesterday at Target that Tide liquid (I didn't look at powder) was 3 times more expensive than Gain or Arm & Hammer.  It was $11.99 while the other two were both $4.99.  I have always bought Tide, and never even looked at other brands simply out of habit.  Shocked, I got Arm & Hammer, took it home, and tested it out.  It seems to do just as good a job at first, and the scent was ok.  After another wash, I can see that Arm & Hammer is harder on clothes.  They were a little faded from just two washes.


Maybe I'm weird, but I'm really particular about the way my laundry smells.  I rarely use dryer sheets because my organic chemistry teacher in undergrad described their molecules as "long greasy strands."  Do you know that's why it makes your clothes soft?  Because it's making them a little bit greasy?  It's true.  I still do use them occasionally though for things like towels that have gotten rough.  When I buy them I have to smell every single box twice though.  Are you particular about any certain part of your laundry process?  Stain treater?  Detergent?  Fabric softener?  Liquid or powder?  Please tell me I'm not the only one...


I said I've only used Tide, but really there's one other special occasion brand of sorts that I use called Dreft.  Every time I've been pregnant, I buy liquid Dreft in the week or so before the baby comes, and wash all their newborn clothes.  The one and only reason I do this is that I love the smell!  Smells have such strong ties with emotions and memories, and Dreft is cemented to newborns for me.  For my first child, I told myself it was better for her sensitive baby skin.  I washed all of her clothes separately, and scrubbed out stains by hand with a bar of Dial soap.  By baby three, his clothes were thrown in with the rest often times and the Tide didn't make a bit of difference except in the cleanliness of the clothes!  I have heard from family that Dreft is great for kids who are sensitive to other brands, but when it comes to getting clothes clean I think it falls far short.  So, I still have it and use it for my almost not a baby, Luke, but mostly just for blankets and bedding.  I've had the same container for his whole 22 month life!

Anyway, in an article from Good Housekeeping published at Yahoo News, they tested 74 different types of detergent, and they came up with some interesting results.  The best overall cleaner was Tide Powder Detergent.  (Huh.  I always thought liquids cleaned better!)  Among liquids, Tide won again but Gain Original was a very close second!  Nearly the same, but 1/3 the cost?  I'll take the Gain!  That'll be my choice next time I go shopping!

Another interesting tidbit: across the U.S. there has been a rash of Tide laundry detergent thefts.  According to snopes.com, people were stealing it and selling it for money or trading it directly for drugs.  They are $10-20 each, not traceable, and everyone can use it.  Maybe this combined with the fact that they're the most popular is the reason they can get away with charging triple?  I don't know.  I was not excited about Arm & Hammer, but I may try Gain next.  Lord knows I have enough laundry to test!!

So, to recap:
Tide:
Pros:
  • #1 cleaner among 74 tested by Good Housekeeping (liquid and powder)
  • I like the scent
  • Cleaned my clothes well
Cons:
  • three times the cost of other detergent
Arm and Hammer:
Pros:
  • Pretty good scent
  • cleaned clothes just as well as Tide
  • 1/3 the price of Tide
Cons:
  • Tested worse than Tide and Gain by Good Housekeeping for tough stains
  • I like the scent less than Tide
  • Harder on clothes than Tide

Dreft:
Pros:
  • Baby smell
  • Hypo-allergenic
  • Gentle on clothes

Cons:
  • Cleaned my clothes noticeably worse than Tide
  • Most expensive at $15.99 for 100 oz.


Laundry Schedule

Four kids + two adults= loads and loads of laundry!! The reason I originally got on this laundry examination kick was because of a blog post I saw at hallelujahismysong.blogspot.com.  My friend Catherine writes this blog, is an excellent organizer, and came up with a system of doing laundry that doesn't involve one full day of load after load.

Currently I do at least one load of laundry per day, but it involves going to hampers, grabbing out a load's worth of some color group, and tossing it in the washing machine.  There is no set end point; no goal for me to finish during the day so it just feels like I'm doing a never ending monotonous task.  Most of all, I hate doing socks, especially tiny baby socks.  I told my husband I think my personal hell would be eternally sorting and folding socks in some cold, damp place...and somehow you'd have to work running in there.  I can't stand running.....

Anyway, my point is that this system makes it feel manageable and gives you a goal to finish each day.  You have something to check off as done at the end of the day, and that doesn't mean every stitch of laundry in the house.
You can view Catherine's list and tips here.

I started with her idea, but modified it to fit with my family.  You can modify either list and make it work for you!


Today is Wednesday, I did all of today's work in a few hours and felt very satisfied when I was done!  I told myself I could go onto the next day, but not until the previous day was done.  We'll see how this system lasts over time, but I have to say so far so good!

Tuesday, April 2, 2013

Mud Soap


Yesterday I had my nephews over, and even though I think all the kids had fun they blew through a million activities.  Then were looking for more!  Normally I suggest some toy or tell them to use their imagination, but I had seen mud soap on Pinterest and thought it might be fun for them!  This is a super simple, fun activity for your kids too.


Supplies:
  • grater
  • bar of soap
  • large bowl or container
That's it!  (Unless you want to add a couple drops of food coloring!)


1. Grate the bar of soap the same way you'd grate a block of cheese.


Use the largest grate you have to get the most realistic texture!  Smaller grates go faster, but they make the soap feel more like thick body wash.


 2. Add a little water at a time until you get the texture of mud.

3. Add 2-3 drops of food coloring (optional).

After we rinsed off the "mud", my kids' hands never looked cleaner!


 The beauty of this project is that it's soap!  It rinses easily off of skin and clothes, and if anything actually makes them cleaner!  The whole house smelled like Dove soap, and when they were done, I just tossed this plastic container into the sink, filled it with water, and there was more fun for Mr. Rocco (below, left).  He "washed the dishes" for me. :-)  Virtually no clean up!