


Supplies:
- old bookshelf in need of some TLC
- one sheet of plywood to fit the back of your book shelf
- $3 paint sample in your accent color of choice
- sand paper: 60 grit and 120 grit
- white primer paint (I like Zinsser brand)
- hammer and nails
- paint brush
- Rustoleum Ultimate Polyurethane


This lovely shelf was a post-wedding money buy from Target. Thank you dollar dance!! I think it cost about $30 when we bought it, and it served its purpose! It made it through 3 moves- one of which was cross country - without big problems. However, the back of this "fabulous" shelf is cardboard, and it started peeling up in year one, and just went downhill from there. Wanting a bookshelf to put in the girls' room, I had an idea!
1. Pull off the old back of the shelf. This was pretty easy for me because it was already half off. It was stuck on with wood glue.
I decided to replace the cardboard back with plywood. The price was definitely right at our local home improvement store, Menards, at $5.15 for a 24 x 48 x 1/4 inch piece. The problem was that the original cardboard back was 24.5 x 38 inches. What to do? Well 24 inches was enough to cover the back, so I made an executive decision to still go with this plywood. However, when I asked if they could cut it shorter for me at Menards, they said they could do larger or different types of wood, but not plywood. They said they only had large industrial saws, not the table saw I'd need. Bummer. No matter, though. I have a hand saw!
2. Put the old shelf back piece on top of the plywood and trace the edge with a colored pencil. Then just saw along the line. Easy! We have the new back for the shelf!


Now, to decorate the back of the shelf! While I was at Menards, I found they had a pretty large selection of wall paper, which salespeople at Lowe's and Home Depot told me was an ancient relic. "You can only really get wall paper online anymore," they said. Well, I'm here to tell you: Nuh-uh. Wallpaper ranged in cost from about $12-50 per roll, and there was also a pretty large selection of wall decals (see my Wall Decals with Nolan post!). I adore the wall paper I chose. It is self adhesive (No wallpaper paste. That really does seem old school to me!), textured, and paintable! The texture looks like a tin ceiling in a 1920s era building. LOVE! It also cost about $12, a mega plus for this thrift hunter!
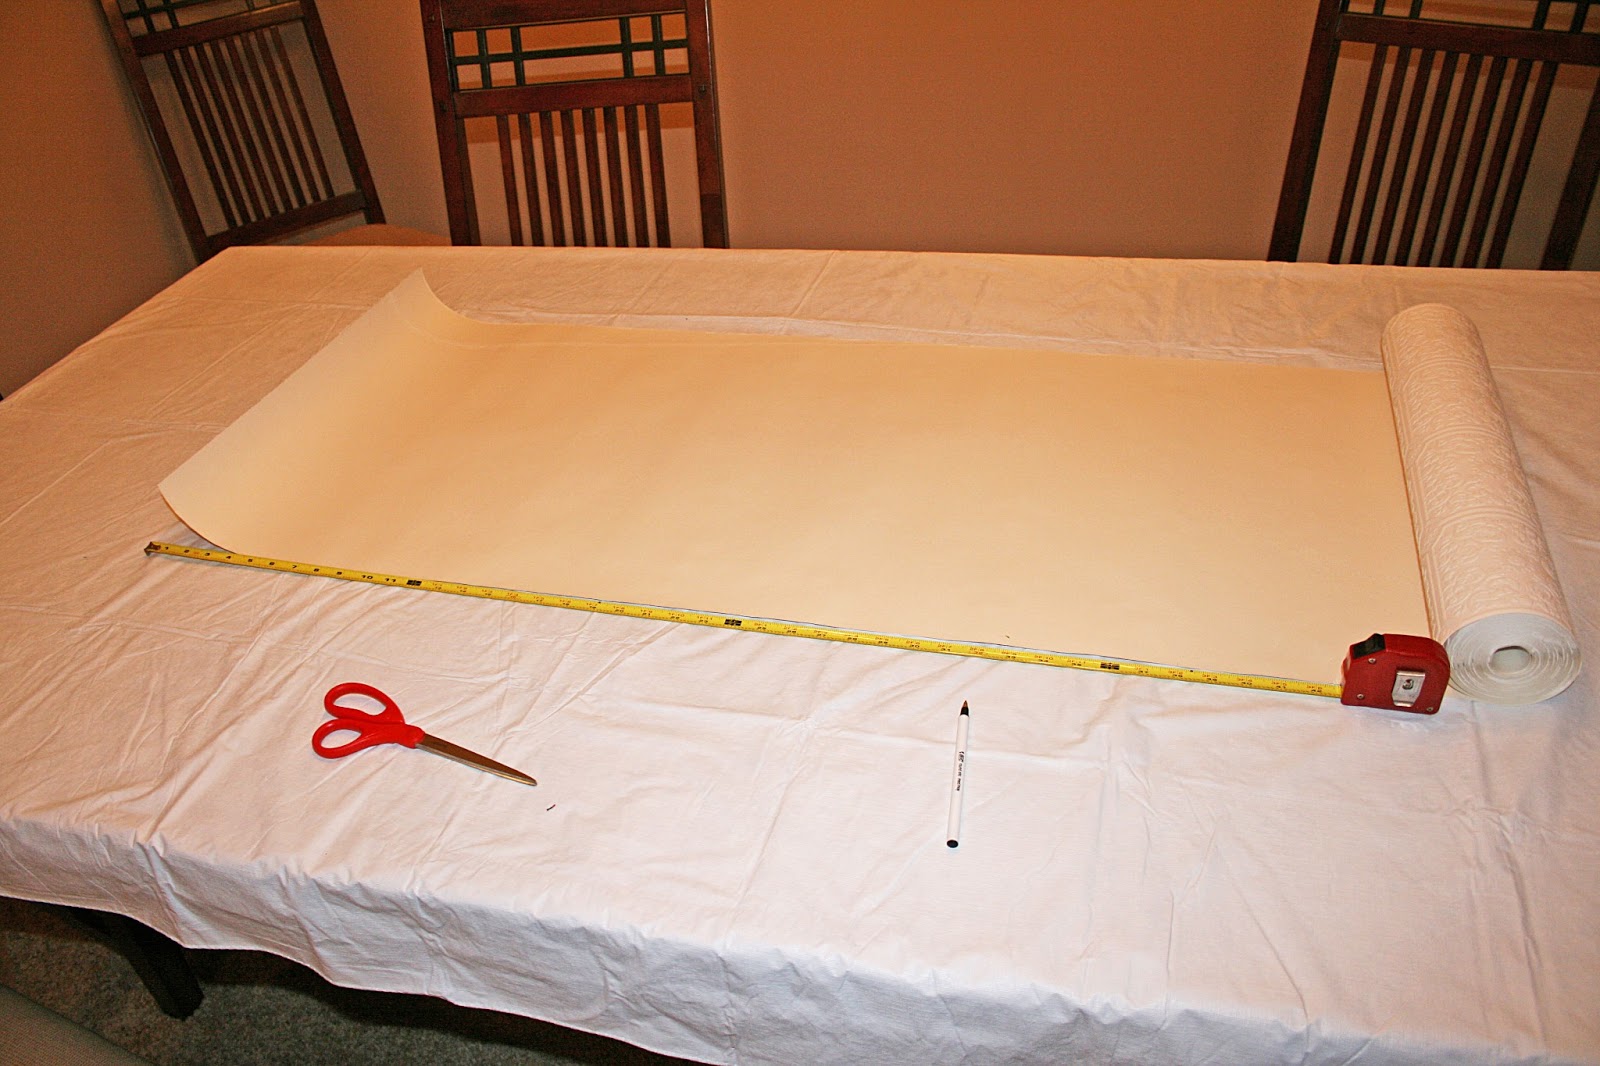
3. Measure the wall paper, and cut to the size that you need. Make sure to line up the pattern of extra sheets of wall paper with the first sheet. It is better to overlap the edges of your plywood by an inch or two, because after the wall paper is applied and dried, we are going to cut off the extra.
There was one down side to this wall paper though: the application instructions had no words. There were only pictures, which were confusing. Here's my interpretation: 4. Soak the wall paper in water for 5 seconds, then let it set for 10 minutes before rolling it onto your surface. That's what I did, and it worked out for me. The wall paper is very sticky, but it is a little movable until you really smooth it down. Try to go fast!!

3. Measure the wall paper, and cut to the size that you need. Make sure to line up the pattern of extra sheets of wall paper with the first sheet. It is better to overlap the edges of your plywood by an inch or two, because after the wall paper is applied and dried, we are going to cut off the extra.

There was one down side to this wall paper though: the application instructions had no words. There were only pictures, which were confusing. Here's my interpretation: 4. Soak the wall paper in water for 5 seconds, then let it set for 10 minutes before rolling it onto your surface. That's what I did, and it worked out for me. The wall paper is very sticky, but it is a little movable until you really smooth it down. Try to go fast!!


5. Cut off the wall paper hanging over the edge of your plywood after it dries. In hindsight, I would have waited until after I had painted. That would give it a cleaner edge.
Also in hindsight, I might have just left it this cream color! The pattern pops more, and it would have given it a look that could last with the girls until they are older. That's not to say I don't like the Razzmatazz color too!

Anyway, I bought a $3 paint sample, and this was the perfect size (and price!) for this project. Dutchboy makes Crayola colors, and I chose Razzamatazz (remember the crayon?). 6. Paint the wallpaper with your sample accent color. Apply two coats. It took 2 coats to get the opacity I wanted.

The plywood will likely bow out a little while the paint in drying. Don't worry, it will mostly flatten back out once it is totally dry.
Back to the shelf. My shelf is MDF with a thin veneer, so I was a little nervous about sanding it! It was actually just fine. 7. Use the 60 grit sand paper and give your shelf a quick once over, giving extra attention to any scratches or imperfections.
8. Wipe off all the sanding dust with a warm, wet rag.

9. Go back over the bookshelf with a 120 grit sand paper. The finer grit will get rid of all the stripey rub marks, and leave a smooth even finish. Be patient! The more time you spend on this step, the better your finished product will be!
10. Wipe of all the sanding dust again with a warm, wet rag.
Now it's time to paint! Full disclosure: I first tried to use white spray paint on the shelf, and let me tell you... it did not go well. First of all, I did it in the garage during Midwestern winter. Not exactly the optimum drying temperature for paint. Read the directions, guys! Learn from my mistake. Also, I used a large paint tarp which is essentially a trash bag, but every time someone walked by it, the tarp would flutter and stick to the sides of the shelf, ruining the smooth finish. ARGH! So frustrating!! So, I went back to the drawing board, and remembered I had this white primer from an earlier project. MUCH better. I resanded, basically started from scratch painting, and it was much better. So for Take 2, 1. I did this painting in my basement-- I'm sorry to say outdoor painting does not work in the winter in my climate (20° F during the day right now!), and 2. I used a garbage bag instead of a giant plastic tarp! A garbage bag costs cents on the dollar and there is no fluttering. Ah well, live and learn. Now at least you can avoid these mistakes!! So,
11. Apply 2 coats white primer to the shelf. I only had to wait 30 minutes between coats with this paint. Follow the directions on the paint you have. "Why white primer? Shouldn't you use paint?" you ask? Well, my end goal color is white so I think on this project we can cut out the middle man of applying a different non-primer paint afterward. Score! If you are doing a different color, you probably will have best results with one coat primer, then 1-2 coats paint.


 |
| I circled the nails because they're so dang hard to see! :-) 13. Spray everything liberally with polyurethane. You want your masterpiece to be built to last! This will protect the finish of your paint. I recommend glossy finish.  |


`


No comments:
Post a Comment