Friday, March 15, 2013

How to Get Crayon out of Upholstery

So, I may have been doing exactly what I shouldn't do and using melted crayon near the couch.  OOPS!  *Side note: if you put crayons in a $2 glue gun, you can use them to make cool melty, drippy crayon art.*  Just don't leave it on and walk away from it!  When I picked up the glue gun, the whole crayon in the gun had heated and was melty.  I did not notice this until I had dripped melted crayon wax all over the arm of my couch.  Nooooooo!! I was so mad at myself!!

So, where does any good 21st century person go to find out how to clean crayon out of upholstery?  The internet!  Of course!  The internet knows everything.

P.S. The internet doesn't know everything....

I tried a whole bunch of tips I got from the internet on how to get crayon out of upholstery, and none totally worked.  Then I thought, Hey! Maybe crayola's website has a tip!  Crayola's website has clearly been in this predicament before.  They have a SUPER comprehensive list of how to get every one of their products out of a bunch of different mediums.  Click here to check out their list.


So, learn from me.  Here are the things that I tried, that I thought would be miracle cures.

1. Use an iron with medium heat and high steam.  Put a paper towel over the crayon, then iron.  The crayon will be absorbed into the towel and out of your fabric!  


This was my first attempt, and actually worked the best of all my home remedies.  It was also the most popular suggestion.  Some wax was absorbed into the paper towel.

The Problem: It took forEHver, many passes, lots of paper towel, and it left heat marks on the arm of the couch.  NEXT!

2. Use vinegar and Dawn blue dish soap.  Scrub and rinse. 


No!  Can I virtually slap these out of your hand?  I tried this on the two areas on the right and it bleached the fabric.  Plus, if I would have kept going I think I would have scrubbed it bald.  Lots of lint came out when I tried this....no.

3.  The Winner!!  What I should have done in the first place!  
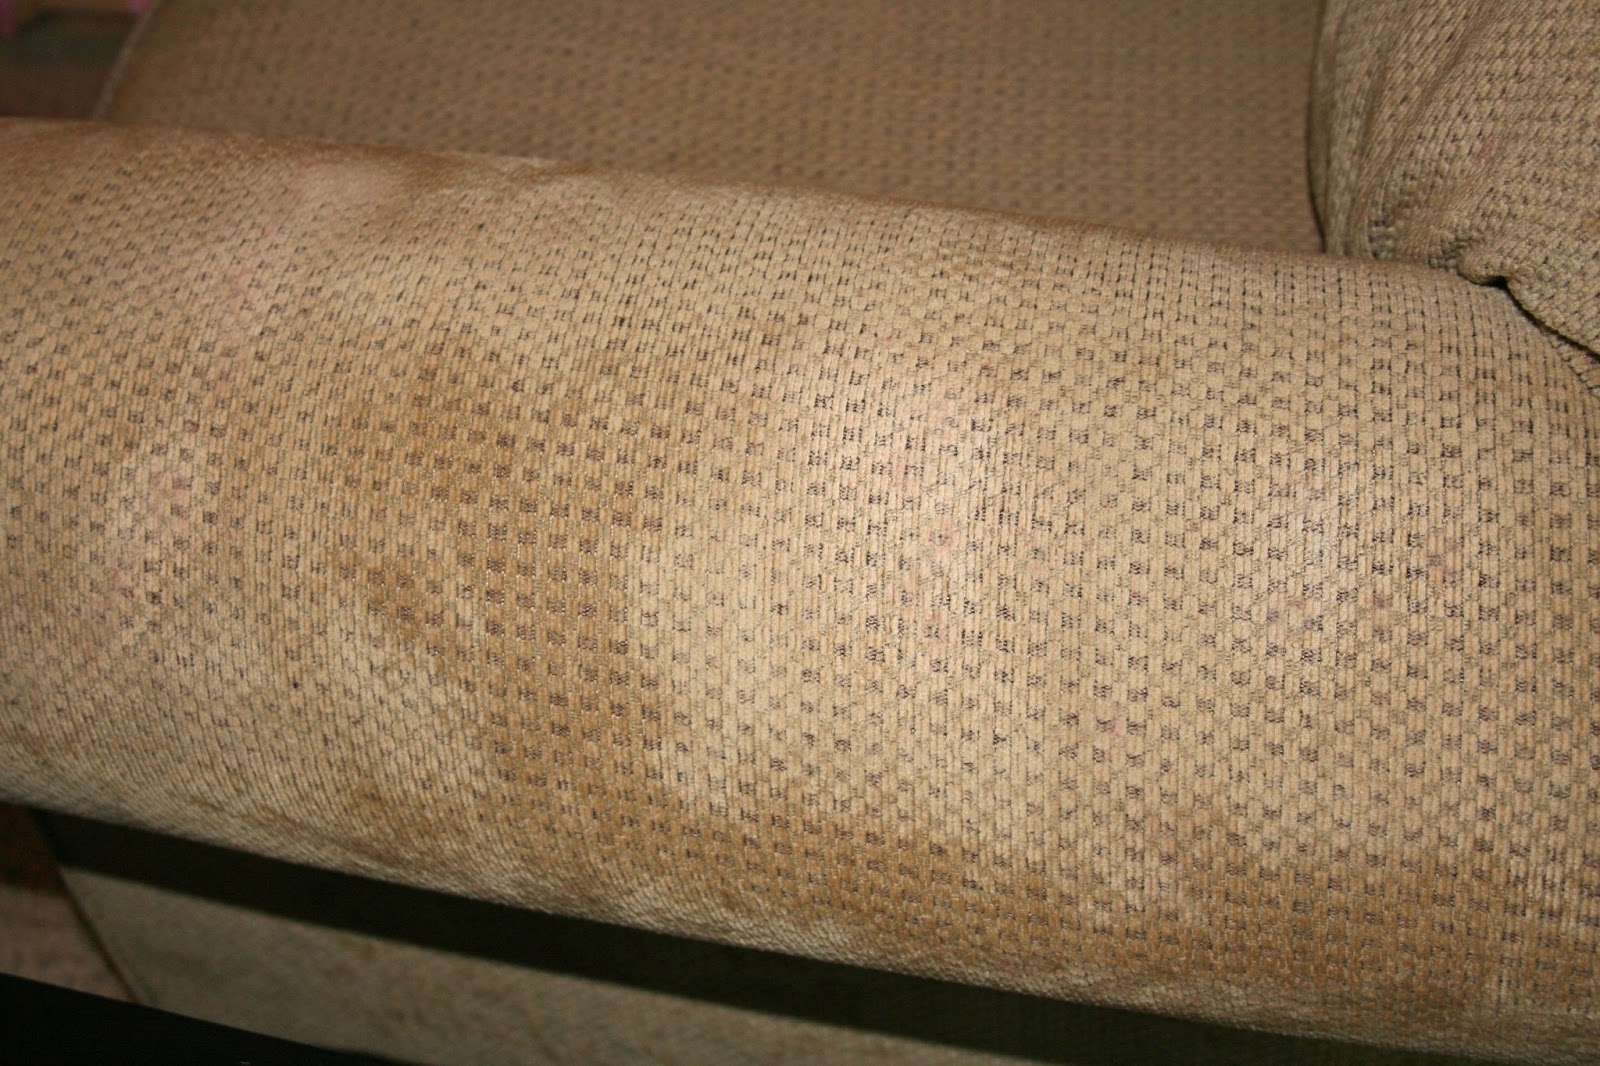


I went to Crayola's website, and they had these simple instructions:

Uuuuuuuuuugggggggghhhhh.  That's what I probably would have done in the first place if I hadn't been so smart to go internet searching! The product I used was Scotchgard Oxy Carpet & Fabric Spot & Stain Remover.

So, I hope this helps you!  Live and learn, I suppose.  (and no more melted crayon for a while!! :-))

Wednesday, March 13, 2013

The Sequester

You've probably been hearing about "The Sequester" ad nauseum for the past few weeks, and maybe it has been going in one ear and out the other.  If our lives are going well, and we are not very acutely effected, it's easy to say, "Leave it to Washington.  They're all a bunch of crooks, but they'll get it sorted out sooner or later."  Well, I'm embarrassed to say it has taken really acutely effecting my life to light a fire under me, and get me learning and reading about what this sequester really is.

Here is what the official White House website has to say about it:


What Is the Sequester? Why Now? 
In the last few years, President Obama and both parties in Congress have worked together to reduce our deficit by more than $2.5 trillion through a combination of spending cuts and increased tax rates. 
In 2011, Congress passed a law saying that if they couldn’t agree on a plan to reduce our deficit by $4 trillion — including the $2.5 trillion in deficit reduction lawmakers in both parties have already accomplished over the last few years — about $1 trillion in automatic, arbitrary and across the board budget cuts would start to take effect in 2013. 
Unfortunately, Congress hasn’t compromised, and as a consequence, harmful cuts — known as the sequester — begin March 1.
These cuts will jeopardize our military readiness and eviscerate job-creating investments in education and energy and medical research, and don’t take into account whether they eliminate some bloated program that has outlived its usefulness, or cut a vital service that Americans depend on every single day.
"Unfortunately, Congress hasn't compromised."   That, Dear Readers, is what I really want to talk about.  Alexander Tytler was apparently misquoted when this was attributed to him, but regardless of the source I think these ideas are worth thinking about as stages of democracy:

From bondage to spiritual faith;
From spiritual faith to great courage;
From courage to liberty;
From liberty to abundance;
From abundance to complacency;
From complacency to apathy;
From apathy to dependence;
From dependence back into bondage.

We Americans have great abundance, and we really do seem to be in the complacency or maybe even apathy portion of these 8 stages traditionally attributed to Tytler.  We don't have to go the way of other democracies.  We can learn from history.  Above all, WE CAN'T BE COMPLACENT.

Now, I don't think that we are headed for a dictatorship or "bondage".  I do however think that because of our complacency, US Representatives and Senators have become wildly out of control in the way they flippantly treat the lives of the every day Americans they claim to represent.


This sequester is the most current installment in a list of scare tactic/threats that our government has imposed on its people.  The House of Representatives KEEPS imposing these arbitrary deadlines, that they inevitably ignore and bicker about.  This is not a reasonable way to discuss and deal with problems.  There should be COMPROMISE and talks that lead to actions.  This is the way adults deal with problems on the level of family, small business, upper level management, etc.  Instead there is stalemate.  Representatives are interested in themselves above their constituents at a level that I still can't believe.

Why Does This Apply to Me?  

My husband Alex works for the contracting department of the Department of Defense (DoD) as a civilian.  Last year at about this time, we were facing furlough and in the 11th hour Congress miraculously pulled out a compromise that saved the department from a melt down.  We were glad that this ridiculous display of egos was over.  Alex went to work, and we were little effected.

This year, the representatives seem to have gotten somehow even worse.  Democrats are using the republicans' plan to slash Medicaid as a jockeying point.  Republicans are using democrats' plan for tax hikes.  Meanwhile, because of the sequester my husband will be furloughed effective in APRIL.  That means a 20% pay cut and forcing him to stay home an extra day each week, which this family of 6 can't afford.  Are you kidding me?  Since when is this sophomoric behavior okay from adults?  Would this be acceptable behavior in a private sector job?

Sit down with PEN and PAPER and write to your representative.  I'm not giving you a form letter to sign.  YOU do it.  Tell him or her you won't be re-electing them unless they start actually compromising.  Not blaming.  Not lying.  Your congressman represents YOU, not himself.  Do the right thing.

Tuesday, March 12, 2013

Maps as Wall Art

 This weekend was much slower pace than most weekends around our house.  I work as a nurse every weekend, but often get either Saturday or Sunday off, and I spent some time doing this fun, easy project!


Anybody remember this ancient relic?  My mother-in-law gave these as Christmas gifts to all her kids every year for many years until GPS and maps were on every device we carry.  They actually are a really great idea, then and now, when you are traveling.  You never know when there won't be a signal or you will run out of battery.  We still keep one stashed in the back of the car just in case!  BUT, I digress!

I cut out a 9x9 inch piece with about an extra 1/4 inch on each side from three pages in the atlas.


1. Glenwood, IA.  Alex and I hiked at a lake outside Glenwood when we were dating, we've had family pictures taken there, we had Reese's first birthday there, and we still go out and hike, swim, and fish with our kids!  Glenwood is and was special to us, so it is picture #1.


2. Boston, MA or more specifically Danvers, MA.  We moved here in 2009 and spent some of the happiest years of our marriage here.  Boston will always hold a very special place in our hearts!


3. Omaha, NE.  Homaha.  We live here, have family here, and both grew up here.  No brainer! :-)


Michael's had a sale on frames (as they do often- check it out!), and I found these on clearance ON TOP of a 25% coupon, so these three frames cost me a whopping $28.  A good price makes for a feel-good weekend project!

Thursday, March 7, 2013

How to Make Your Own Curtains


Hi Guys!  I am very slowly but surely trying to decorate our master bedroom, and the next step is curtains!  I had a bright yellow curtain with a traditional pattern in my mind, and I am glad for once I was patient!  Not only did I find them, but the fabric was 40% off!  It was a good day.  :-) The room is yellow and gray, and I eventually want to paint the walls a pale gray so I wanted bright, sunny, happy curtains that would really pop against the duller color.  So, here is how I did it!  I hope this helps you to do curtains in your own home!

What you'll need:
  • 5 yards of fabric that is 45" wide.  Check at your fabric store, the bolts tell you how wide the fabric will be.  You'll usually find this in Home Decor Fabrics or Upholstery Fabrics.
  • sewing machine
  • sewing ruler
  • fabric scissors
  • thread
  • yard stick
  • pins
These are instructions for standard 84" curtains.

1. Unfold/unroll your fabric and cut off the last 10 inches of the fabric.  Set aside.

2.  Fold the rest of your fabric width-wise then lengthwise (hamburger, then hotdog fold) very neatly.

3. Cut the fabric along the lengthwise fold.  You now have two equal, straight edged pieces! Yay!  Set one half aside.

4. Repeat with your remaining fabric.  Fold width-wise, then lengthwise and cut along the lengthwise fold.  These will be the two panels for your first window!  Set one of the panels aside.


5. Cut off the each corner at a 45 degree angle about 1/2 inch into the corner.


6. Fold an edge of the fabric in a 1/2 inch, and pin it in place.


7. Now sew a 1/4 inch seam.  

8. Repeat step 6 and 7 for all four sides of your panel.


Remember how you cut off the corners?  This will make a nice, neat point at the corners of your finished panel.


9. Set your panel aside, and grab the 10 inch piece of fabric you first set aside.  You are going to use this to make loops for the curtain rod.  Cut nine 3x10 inch strips from the fabric.

10. Sew a 1/4" edge along each of the long sides of the strip.


11.  Overlap the two ends of the strip to make a loop.  Pin and sew together (about 1/2 inch of overlap).

12. Repeat for 3 loops. 


13. Lay your loops on the wrong side (back) of the top of your finished panel.  Loop 1 should be 2 inches in from the left edge.  It should be centered under the 3 inch mark on your yard stick.
Loop 2 should be centered under the 13 inch mark.
Loop 3 should be centered under the 23 inch mark (about 2 inches from the right edge).

14.  Sew the top and bottom of each loop to the back of your panel.  Voila!  You've just sewn your first panel!  


15.  Repeat Steps 5-14 for each panel.

16. Enjoy your beautiful, inexpensive curtains!


Saturday, March 2, 2013

Easter Centerpiece DIY


This is a fun and easy project to add a little Easter flair to your home!  Millions of us are going to dye Easter eggs this year.  You hard boil the eggs, dye them, then do that awkward wait and wonder game.  Are the eggs are still good to eat or should I throw them away?  Otherwise, you are so dang sick of eating these hard boiled eggs after a while they go in the trash, and you feel guilty for wasting the food.  Not to mention you had to destroy a fun little masterpiece by your little one.  Don't you wish you could save some of the best dyed Easter eggs this year?  Here's a great way for you to do it!

1. Skip the hard boiling, and dye fresh eggs.  Yay!

Here's a little Pinteresty tip: use a whisk.  It really does work great for not so coordinated little guys.  Otherwise dye eggs the way you normally would.


Luke skipped dying eggs and had some lunch.  Still a little small for this job!
2.  Once the eggs have been dyed, use a push pin to make a hole in the top and bottom of the eggs.  Jab a few times until each hole is at least 2-3 mm wide.


3. Blow from one end of the egg into a bowl.  It's amazingly easy to get all of the contents of the egg out.  CAREFUL though!  If the pressure's too high, the egg will shatter.  


Save your eggs for omelets, cooking, baking, egg washing... whatever your little heart desires!


4. (Optional) We painted Mod Podge on the outside of the eggs and sprinkled with glitter for added designs! :)

5. Stuff a dollar store basket with newspaper (I would use green tissue paper or construction paper if I did this again).

6. Arrange the eggs in your basket, then glue in place!  I used wood glue.  Use whatever you have on hand!  A hot glue gun would be great as well.  Make sure you use something that's pretty fast drying so the eggs don't slide around as they're drying.


7. Add Polyurethane to your finished product so it will be shiny and last for years.  You've frozen a memory of dying Easter eggs with your kids in time, and added some festive decoration to your home!


Friday, March 1, 2013

Use Wheatgrass, Skip the Plastic

Wheat grass is great for an Easter-ish centerpiece during Lent too!

It adds much needed green grass when everything outside is bleak and gray!


Guys, I hate plastic Easter grass.  I hate it so much.  Shreds of it get pulled apart and spread all over the house.  This means I will inevitably be pulling it out of the vacuum and baseboards until Christmas.  But, an Easter basket looks so plain and barren without something to fill it in!  So I came up with an idea, and I've since seen it done by others too: wheat grass.

It is T-31 days until Easter.  We are going to plant it, and have a little bed of real grass in our baskets this Easter.  These are my steps and costs.

Supplies:
  • Easter baskets: $1.00 from Target
  • Wheat grass packet: $1.69 at your local plant store
  • 2 plastic bases for pots or planters: $0.14: they come in many sizes and shapes.  You can find them at your local plant store
  • potting soil: around $6 for a 10 qt. bag.  I recommend potting soil specifically for seedlings, you guessed it, at your local plant store.
  • coffee filters
  • scissors
  • shovel


1. Push a hole through the middle center of the bottom of one of the plastic trays.


2. Cut out the bottom of a coffee filter and place that over the hole.  This will prevent dirt from falling through, but not water.  If the water can't drain, the soil can grow mold.


3.  Add potting soil to your desired level.  Make sure it's deep enough for grass roots: about 3 inches.  Then put this plastic container into your other container without the hole.


4.  Pour enough water on the soil that it's damp to touch.  Mix the soil so the water is evenly distributed.  Then tamp down firmly.


5. Spread the seeds over the top of the soil evenly.   6. Push the seeds down about 1/8 inch with your fingers.


Now, wait for your grass to sprout!  It should happen in 3-5 days.


Seeds on a tray on my nightstand.


The oncology (cancer) RN in me can't help but share the health benefits of wheatgrass too!  I could have used any type of grass seed.  I thought about the blue grass that grows in our yard.  I chose wheatgrass because it is fast growing and soft.  Although I knew wheatgrass was healthy, I wasn't sure how.  I was pleasantly surprised!


According to the Journal of Clinical Oncology, wheatgrass is an alternative to blood transfusion in terminally ill cancer patients.  Wheatgrass is a complete protein with 30 enzymes, vitamins and minerals.  Its juice is 70% chlorophyll.  Chlorophyll is sort of like the blood in our bodies for plants, and has a similar structure to hemoglobin, the oxygen carrying component of blood.  An article from Mayo Clinic claims that eating wheat grass may fight cancer, anemia, diabetes, constipation, infections, skin conditions, ulcerative colitis, and joint pain. 


Doesn't it look like spring outside?? ;-)
Hopefully it will once Easter is here.
Well, I was fascinated by this!  Like a lot of child bearing age women, I am always borderline anemic (low hemoglobin) so this sounds fantastic!  Wheat grass is supposed to be very easy and fast to grow, sprouting in 3-5 days.  I am going to grow it on my nightstand in my bedroom- out of the way of toddler fingers, and in front of a window!  I like the idea of being able to go up and clip some wheat grass and put it in a smoothie, or clip it into soup or salad.  I've eaten wheat grass before, and frankly it tastes like grass from the backyard.  So, if you're like me you're not eating it for the flavor, but it's very tolerable.  Some people also eat the seeds, commonly called winter berries for similar health benefits.

Day 3
Day 6

Day 6
Day 9
When I first planted the seeds on March 1, the plant store only had one packet of wheatgrass seeds left, so the seeds were a little sparse.  Now, we have more seeds, so I planted them on March 9. 

I also found these Easter baskets at Target for $1!  They are the perfect size for my plastic!  I just cut off about 2 inches from the plastic so they would nestle in the basket and give it some depth.  
Pink and purple plastic cut.  Blue and green baskets' plastic not cut yet.
Day 15

Day 15
I am excited to see our grass become a carpet of green! (Just in time for St. Patrick's Day!) I will keep you in the loop on the progress of the seeds!  Check back for updates!